(Re)install an IOS operating system on a Cisco 2960 switch
Prereqs
- a PC (BIOS/UEFI) running Linux Mint 21
- minicom terminal emulation software
- (a tFTP service)
- a console cable
- (a network cable)
- a Cisco 2960 24TT-L or 24TC-L Plus switch
Situation
At the time of writing, the latest IOS for...
- a "Cisco 2960 24TT-L switch" is "15.0(2)SE11"
- a "Cisco 24TC-L Plus switch" is "15.2(7)E8"
Version "15.2(7)E8" does NOT run on a "Cisco 2960 24TT-L switch". Version 15.0(2)SE11 runs on both switches. I'll use that version for the examples.
IOS transfer over serial (xmodem)
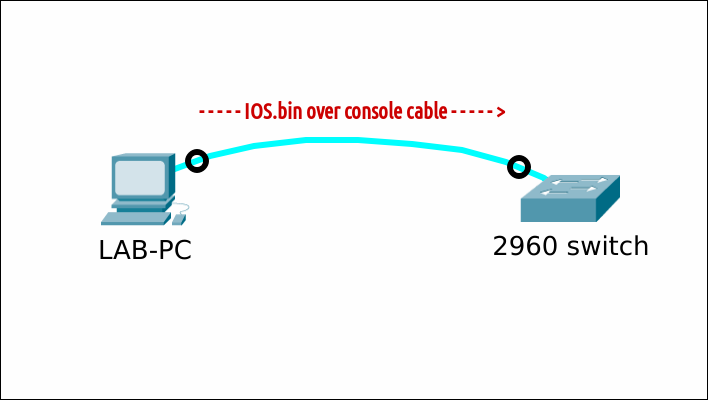
From IOS
Verify that there is enough space left on the Flash filesystem to add an (additional) IOS. In this example, I will simulate a missing IOS by deleting it. Do not reload!
Set the baud rate to 115200 to speed up the transfer. You will lose the connection after the last command. Some gibberish characters can emerge.
Adjust the settings in your terminal emulation program to match the new baud rate. For minicom, press Ctrl+A and then Z. Type O and choose "Serial port setup". Change setting E and Enter twice. Exit.
Press Enter The connection is back. Initiate an xMODEM transfer. Confirm the destination filename. The switch will then prompt you to start the transfer from your terminal emulator.
For minicom, press Ctrl+A and then Z. Type S (Send files) and select "xmodem". Navigate your way to the new IOS file (here /srv/tftp). Press Space to tag the file and enter "Okay" to send.
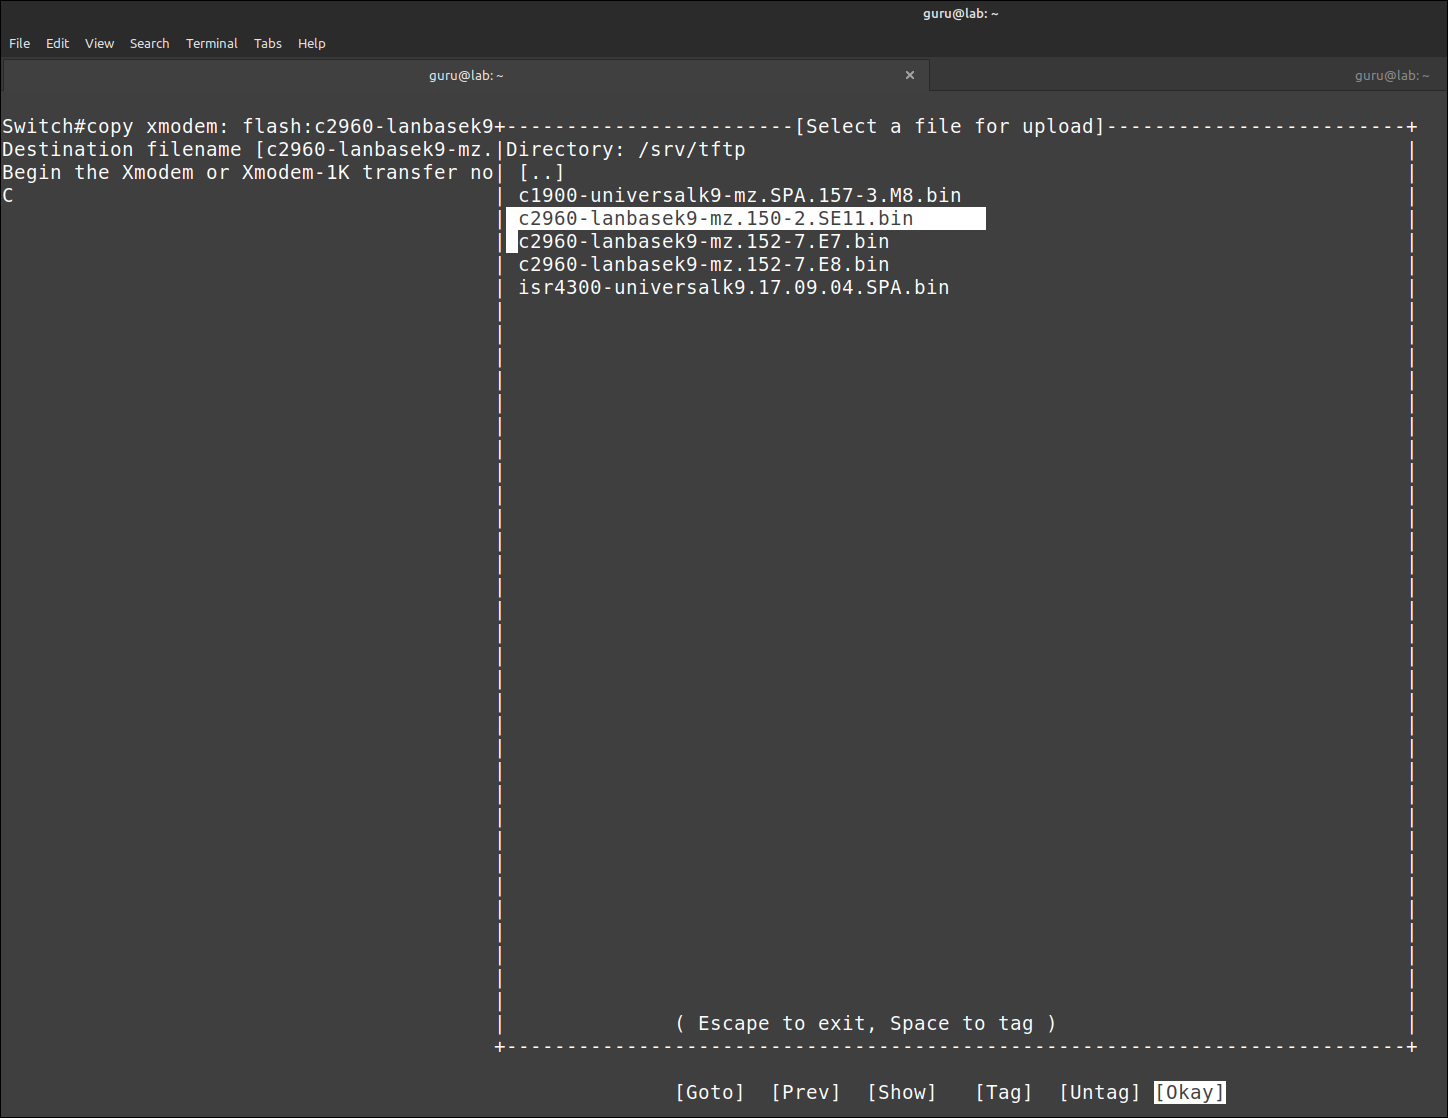
Grab a coffee. This can take a long time depending on the size of the IOS image. Wait for the transfer to complete and then press Enter to quit.
![]()
Make the switch boot from the newly transferred IOS image, verify and reboot.
You have to adjust the settings in your terminal emulation program again, to match the default baud of 9600. Verify that the correct IOS image is loaded. Enjoy your new IOS!
From ROMMON
First, start the switch in ROMMON-mode.
Verify that there is enough space left on the Flash filesystem to add an (additional) IOS. In this example, I will simulate a missing IOS by deleting it.
Set the baud rate to 115200 to speed up the transfer. You will lose the connection after the last command. Some gibberish characters can emerge.
Adjust the settings in your terminal emulation program to match the new baud rate. For minicom, press Ctrl+A and then Z. Type O and choose "Serial port setup". Change setting E to "115200" and Enter twice. Exit the configuration menu.
Press Enter The connection is back. Initiate an xMODEM transfer. The switch will then prompt you to start the transfer from your terminal emulator.
For minicom, press Ctrl+A and then Z. Type S (Send files) and select "xmodem". Navigate your way to the new IOS file (here /home/guru/Downloads). Press Space to tag the file and press "Okay" to send.
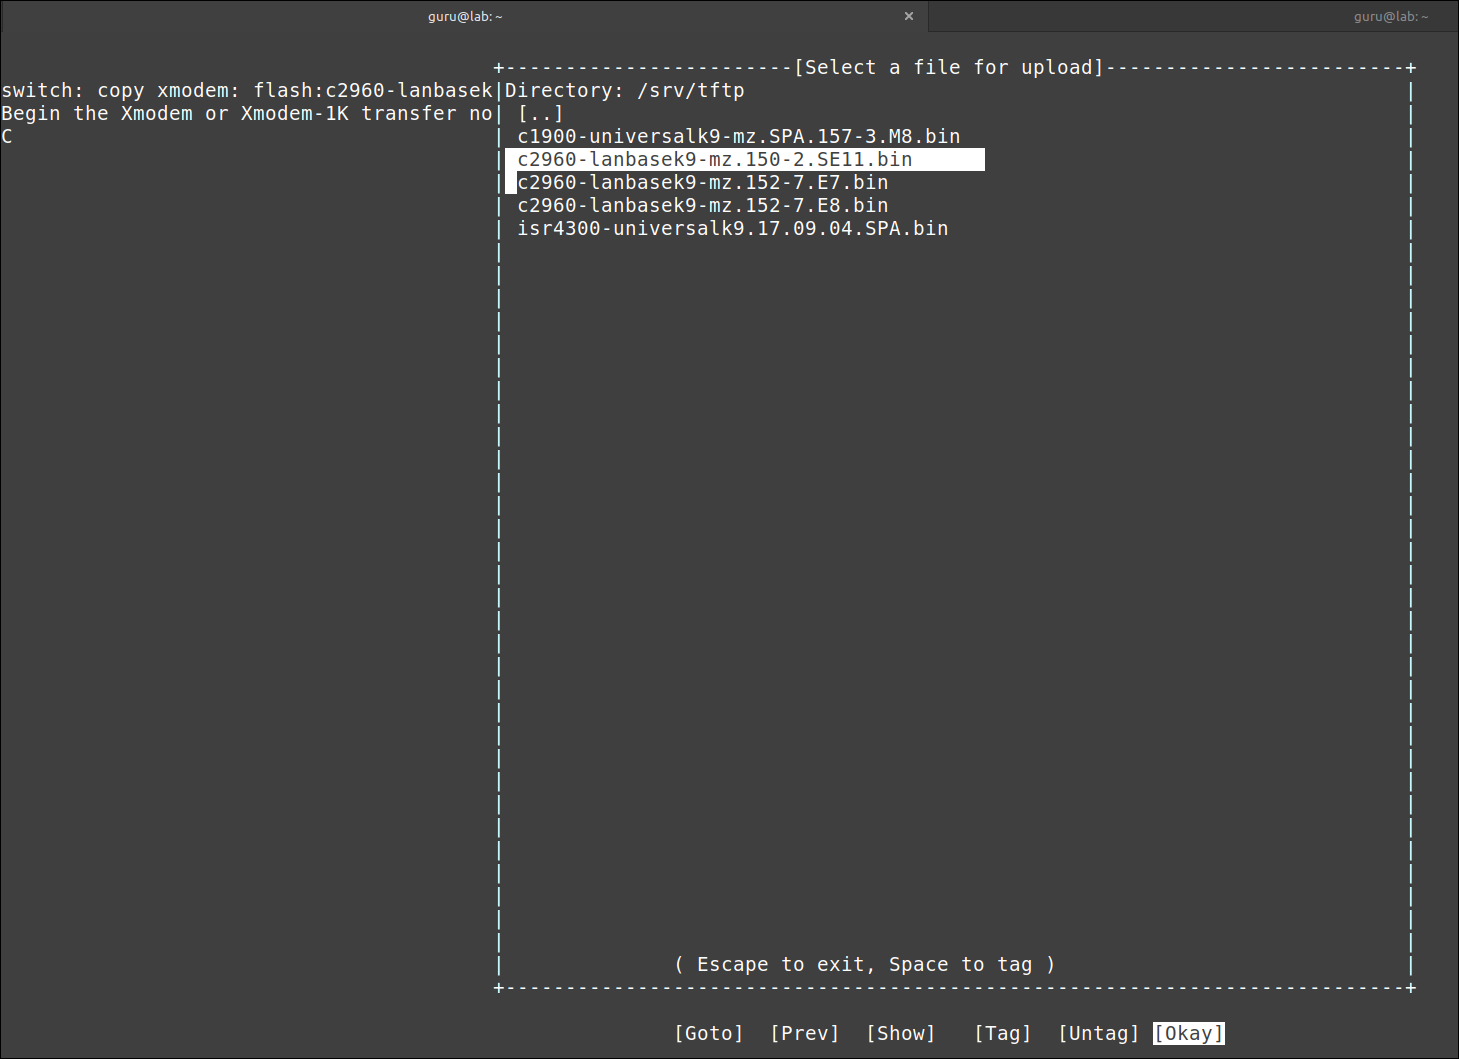
Grab a coffee. This can take a long time depending on the size of the IOS image. Wait for the transfer to complete and then press Enter to quit.
![]()
Update the BOOT parameter to match the new IOS.
Set the BAUD rate back to the default (9600 bps). You have to adjust the settings in your terminal emulation program again. Press Enter The connection is back.
Finally, boot the switch manually.
Verify that the correct IOS image is loaded. Enjoy your new IOS!
IOS transfer over network protocol
Transfer using a network protocol is only possible from IOS, not from ROMMON-mode.
tFTP
Verify that there is enough space left on the Flash filesystem to add an (additional) IOS. In this example, I will simulate a missing IOS by deleting it.
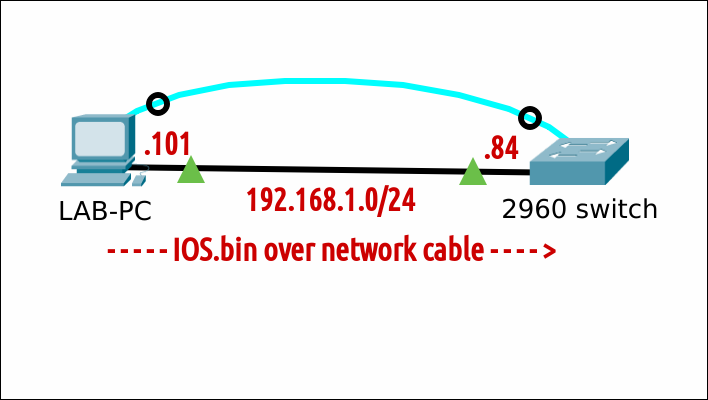
You need a tFTP service on the LAB-PC. Copy a valid Cisco IOS image file to the tFTP directory where files are served from. Adjust permissions.
- Show the name of the network interface on the LAB-PC (in this case: enp0s25)
- Configure an temporary IP address and subnet mask.
- Verify.
Configure an IP address and subnet mask on the switch. Verify.
Optional (in this case): ensure that the TFTP session is sourced from the correct interface (here: VLAN 1).
Verify connectivity between the LAB-PC and the switch.
Copy the IOS image from the TFTP server to the switch's flash memory.
Make the switch boot from the newly transferred IOS image, verify and reboot.
Verify that the correct IOS image is loaded. Enjoy your new IOS!
SSH (sFTP)
todo
HTTP
todo