Configure BIOS/UEFI
Turn on the computer
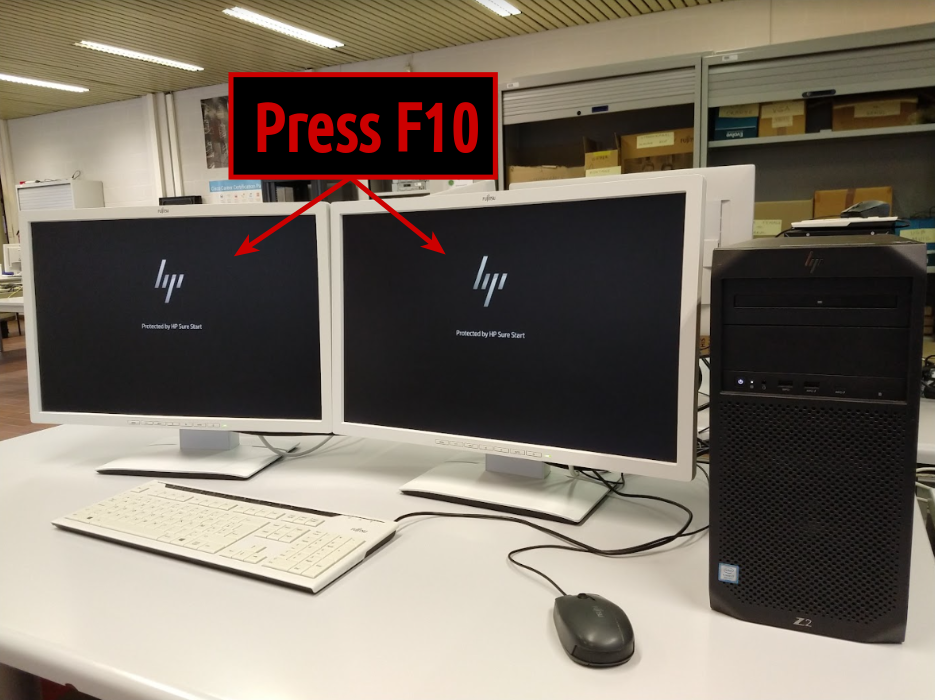
Start the PC. In this case (HP Z2 PC), press F10 once at the "HP splash screen" and wait. Specifics vary from computer to computer. Consult your hardware manual.
Enter the BIOS/UEFI Setup Utility
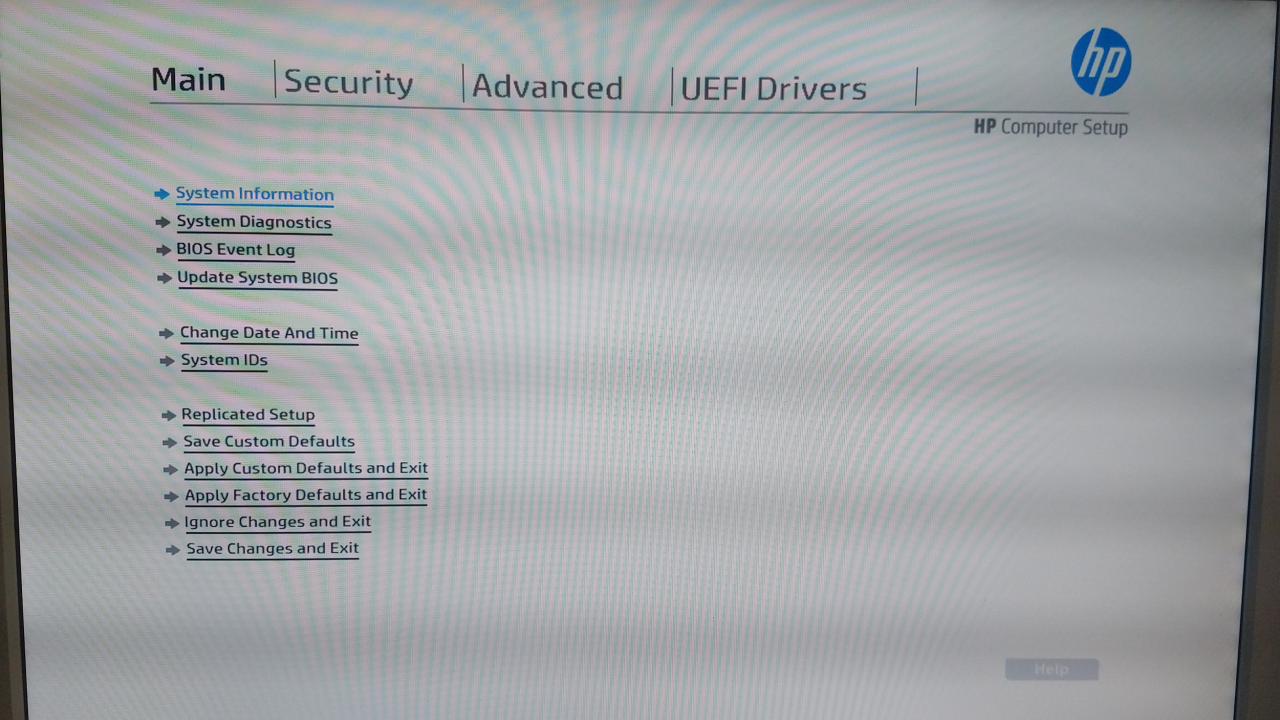
After pressing the correct keyboard command, you'll enter the BIOS/UEFI Setup Utility.
Wipe the harddisk (if possible)
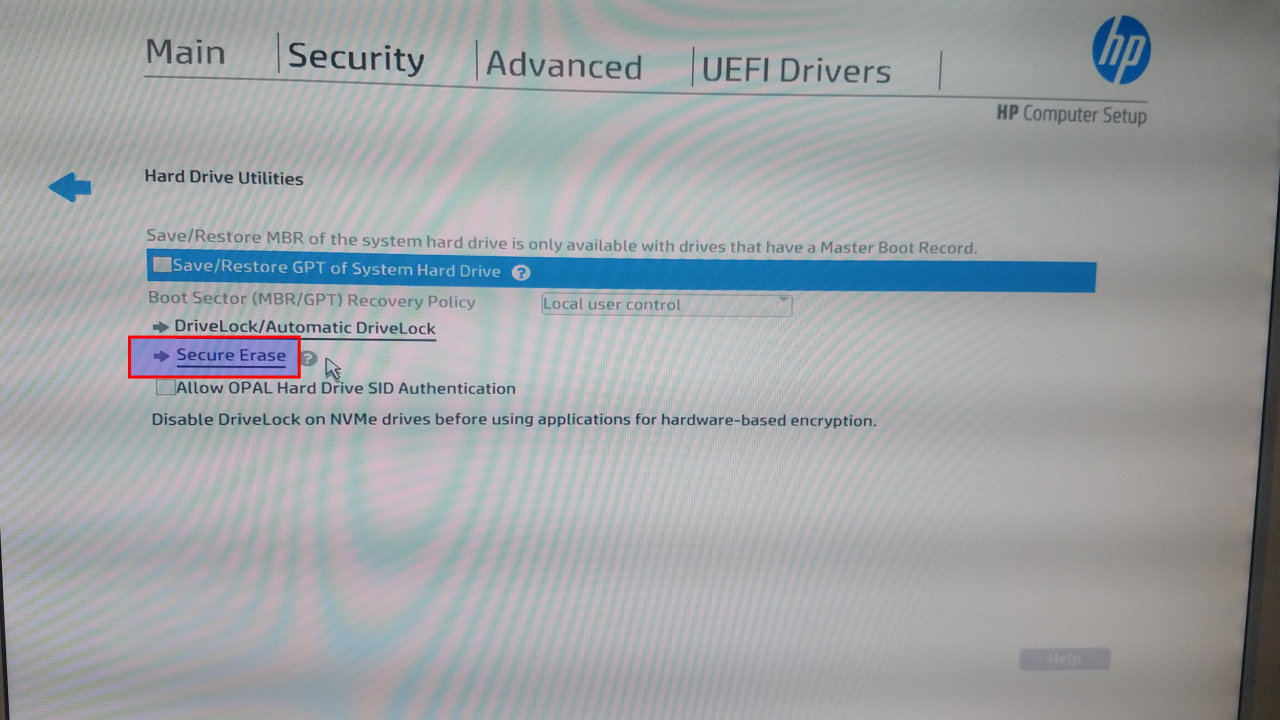
Some systems make wiping the harddisk possible from BIOS/UEFI (e.g. "HP Z2 PC").
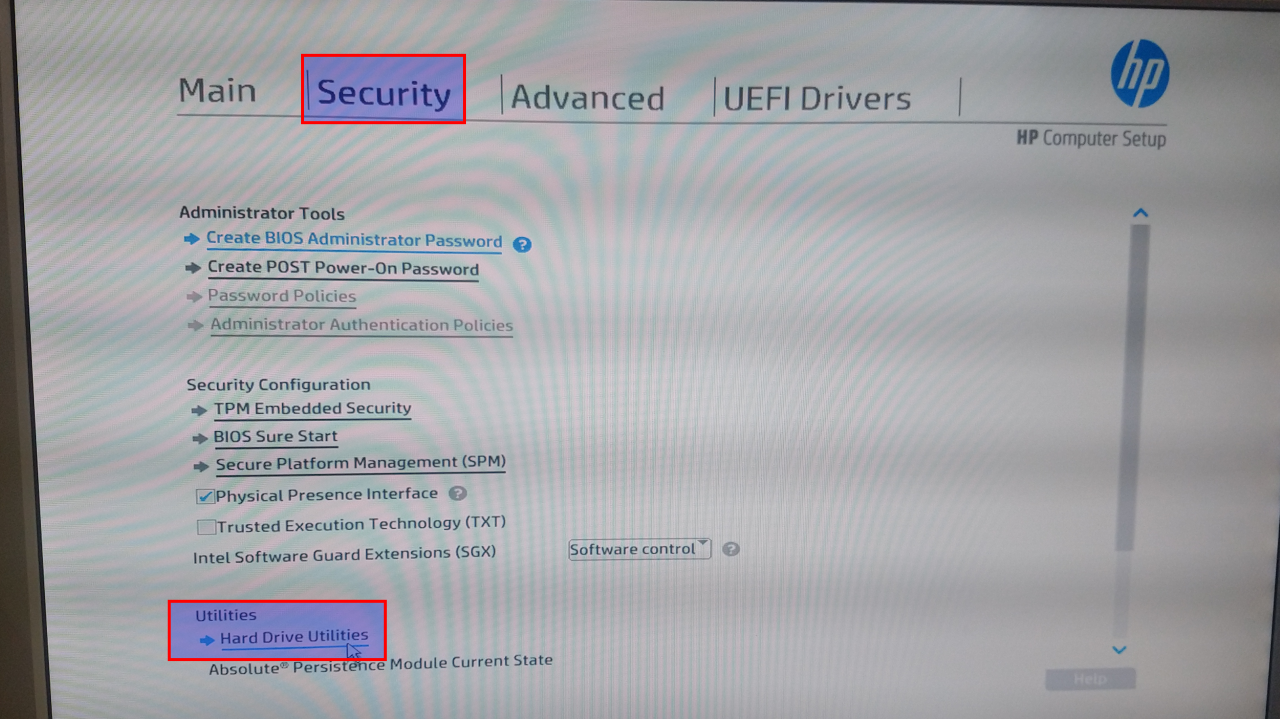
Select tab "Security -> Hard Drive Utilities".
Select "Secure Erase".
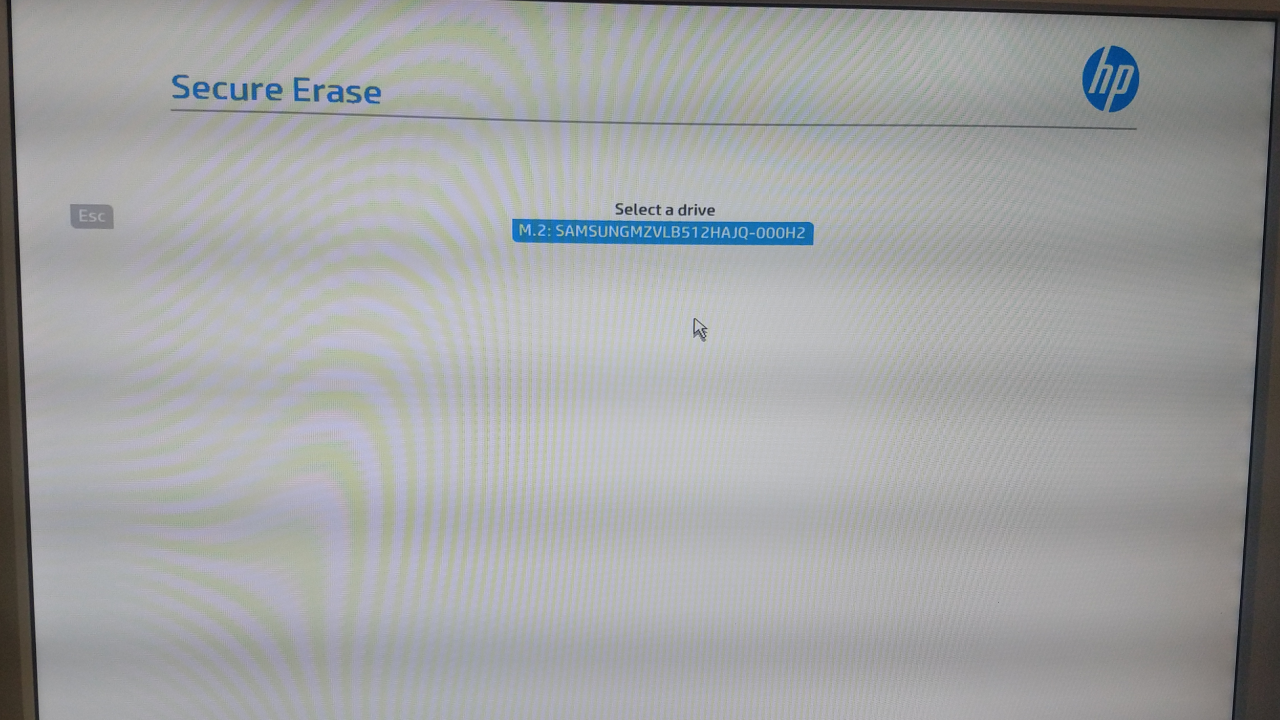
Confirm your drive.
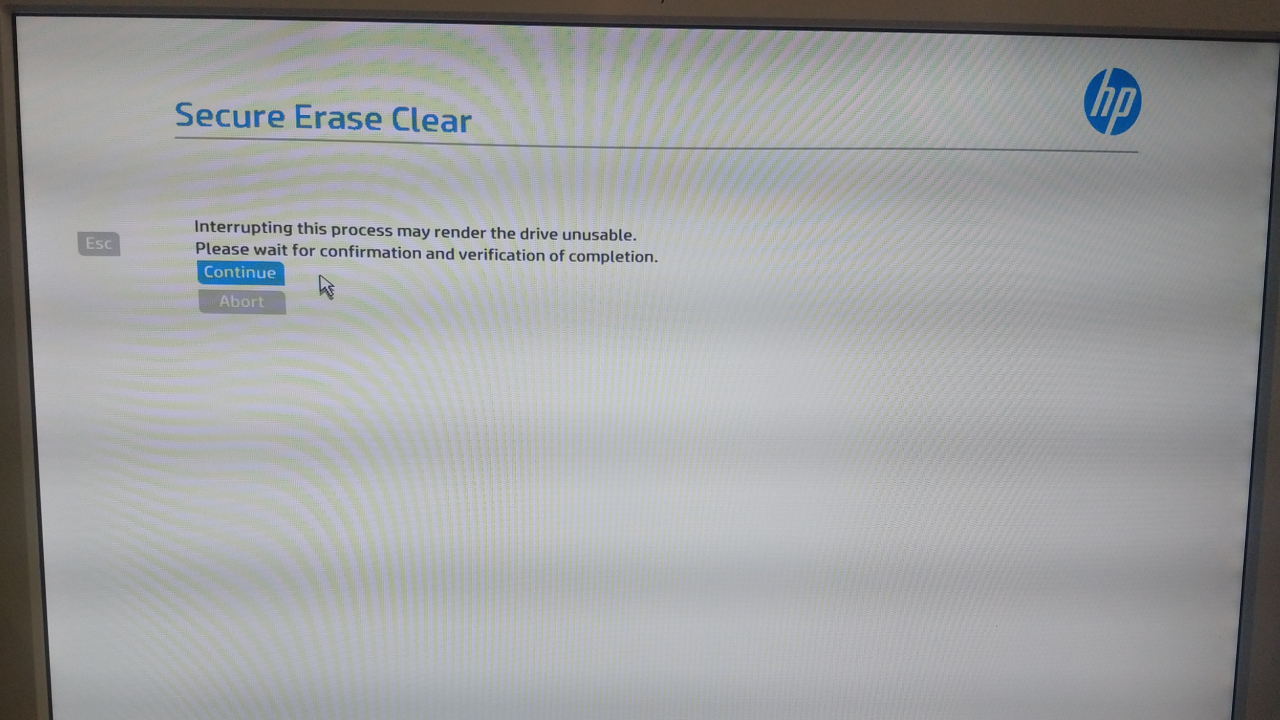
Read and comprehend the message. Choose "Secure Erase (Format NVM) Clear" in this case.
![]()
Confirm.

Confirm again.
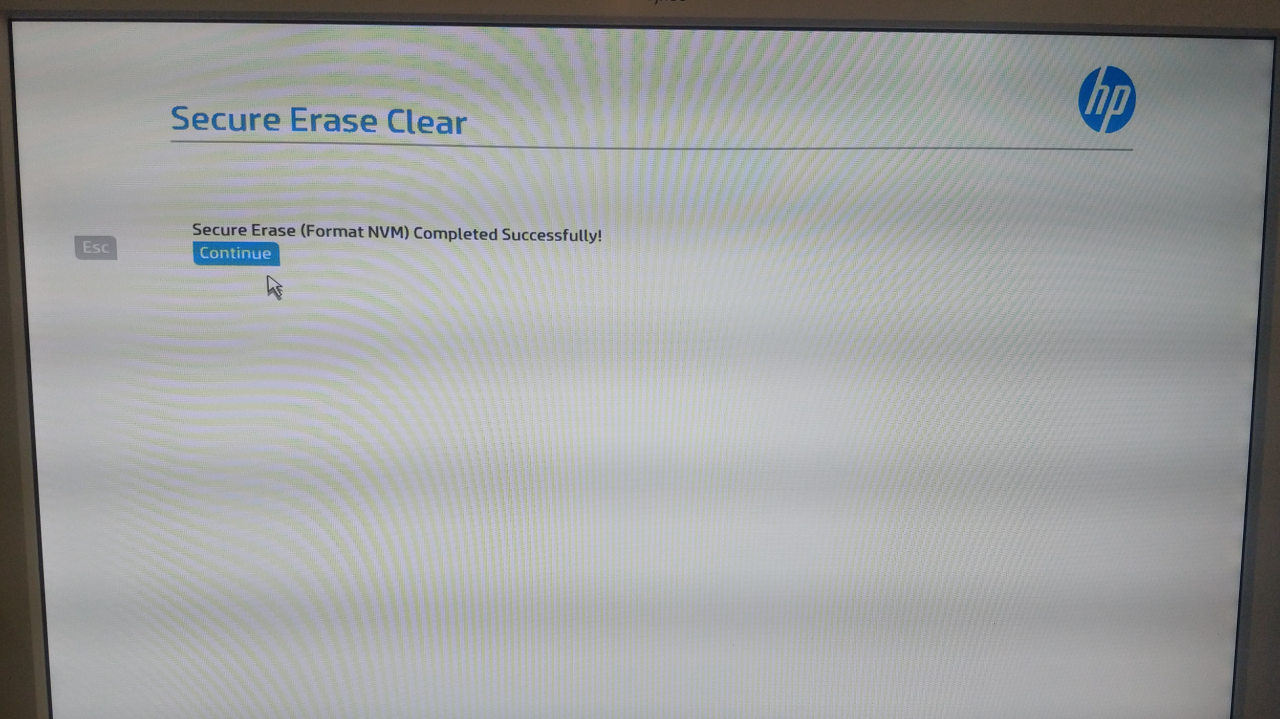
The wipe completes successfully. Press Esc.
Select the boot mode
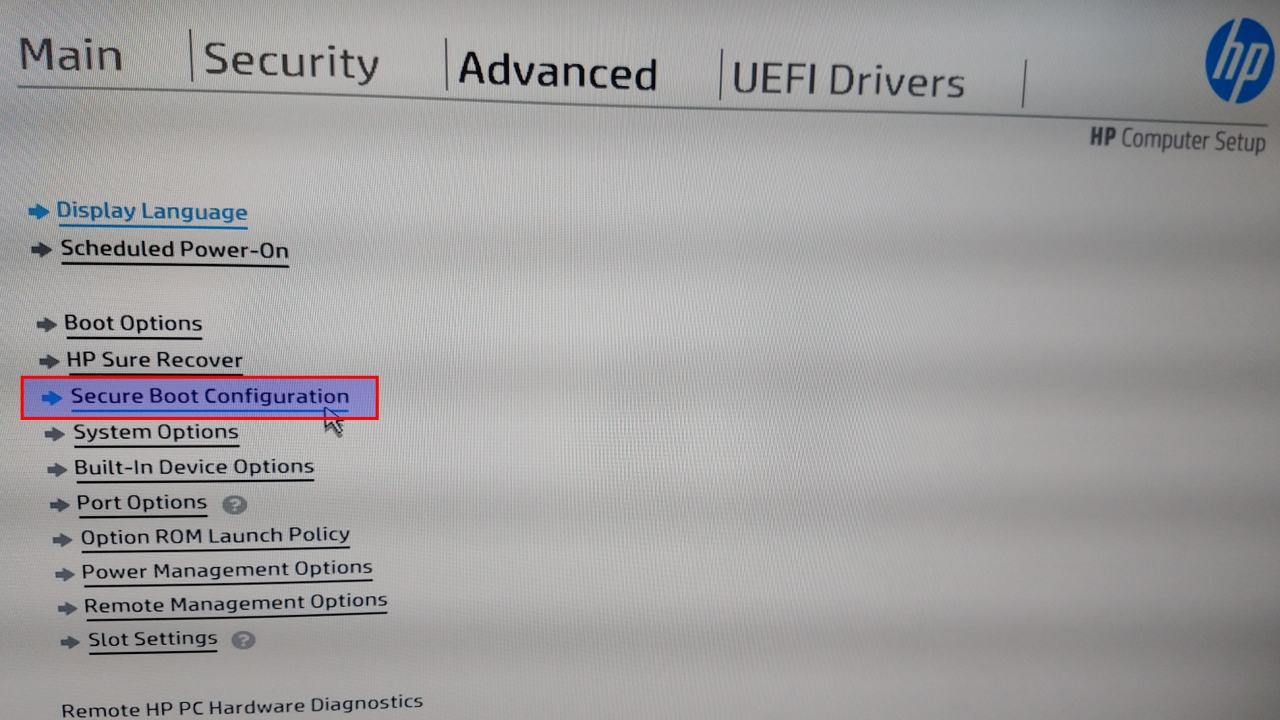
In this tutorial, we do not use BIOS, but UEFI-mode. For e.g. a "HP Z2 PC", select "Advanced -> Secure Boot Configuration".
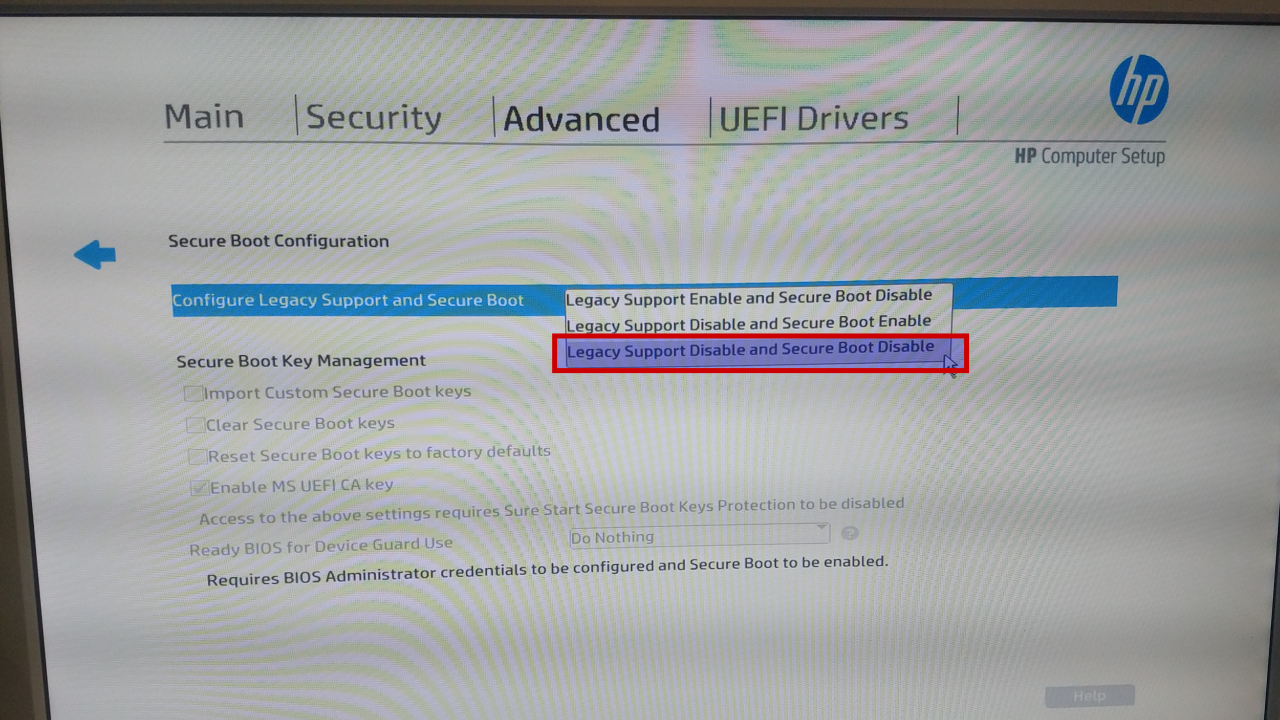
Make sure "Legacy Support Disable, Secure Boot Disable" is selected.
Save/confirm your changes and exit
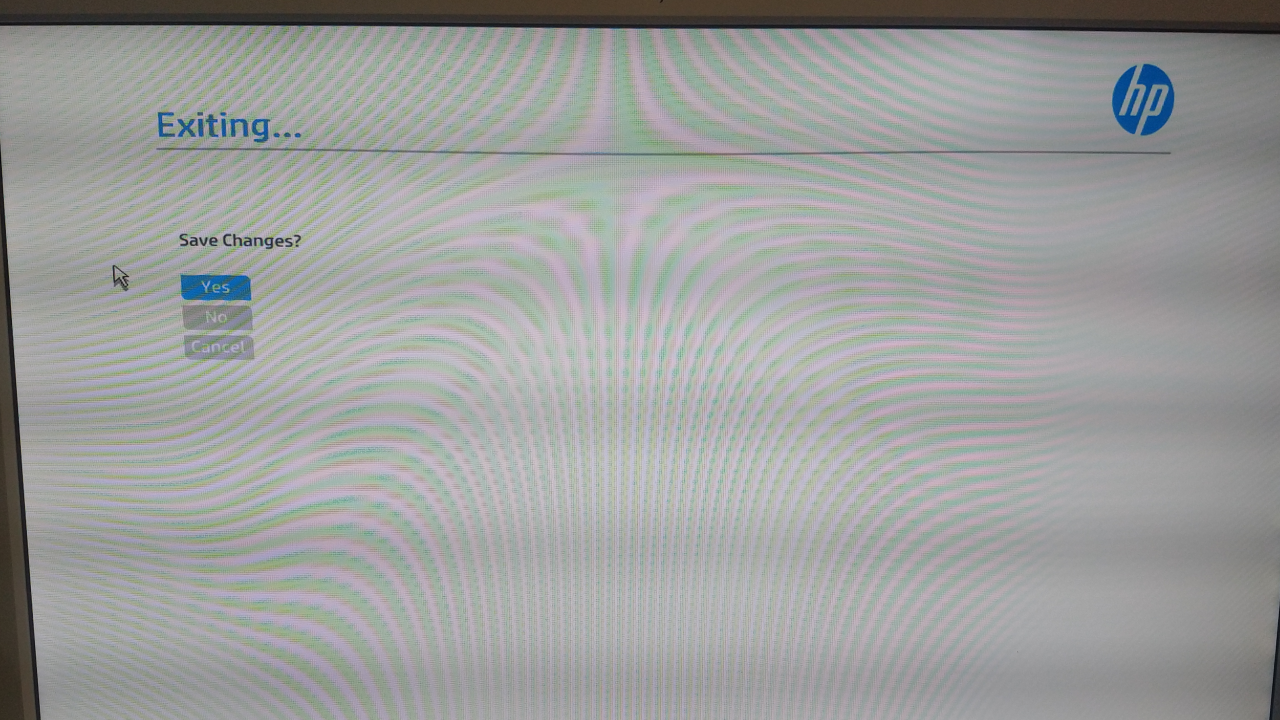
Exit the utility using Esc and save changes - if any.
Shutdown
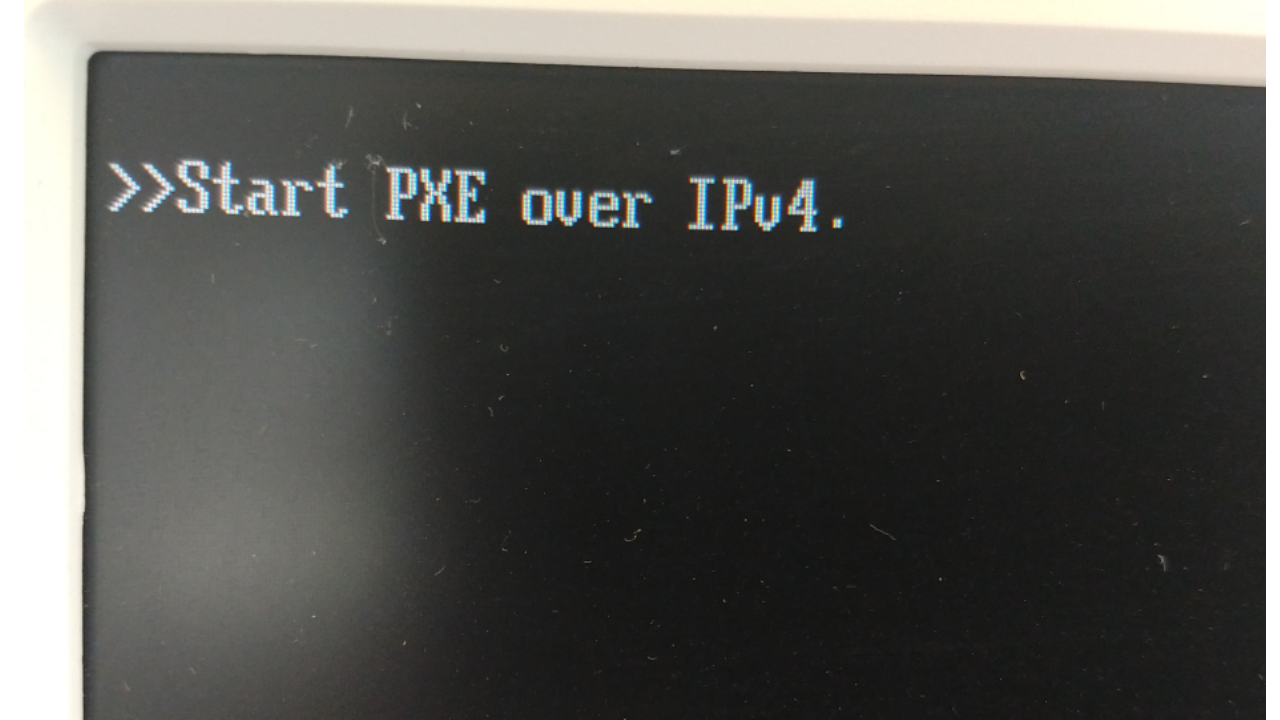
If you could wipe the harddisk, the sytem tries to PXE boot (and it will fail, that's expected). If you could not wipe the harddisk, it may or may not boot (depending on whether an OS is present or not). Nevermind. We will eventually erase possible partitions in the next steps. Shutdown the PC by pressing the "power button" long enough.